Showcase Your Spotify Activity on your GitHub Profile
GitHub profile READMEs are a great way to showcase your work, share your interests, and keep your followers updated. But manually updating your README can be time-consuming. With tools like readme-scribe and TuneFeed, you can automate this process and keep your profile fresh with the latest updates.
In this guide, we'll walk through how to set up your GitHub profile README to automatically include your latest Spotify activity using TuneFeed and readme-scribe.
Step 1: Set Up TuneFeed
TuneFeed allows you to generate RSS feeds from your Spotify activity. Follow these steps to set up TuneFeed:
- Visit TuneFeed and sign in with your Spotify account.
- Create an RSS feed for the activity you want to showcase (e.g., current listening, listening history, or playlists).
- Copy the RSS feed URL.
Step 2: Create or Update Your Profile README
- If you don't already have a GitHub repository named
<your-username>/<your-username>, create one. This repository will hold your profile README. - In this repository, create a README.md file if it doesn't already exist. You may leave the README.md file empty for now.
Step 3: Add the readme-scribe Action
To automate the updates to your README, we'll use the a GitHub Action. All those steps are done in your <your-username>/<your-username> repository.
You will need to create a new workflow file in your repository. This is how your .github/workflows/readme.yaml file should look like:
name: Update README

on:
  push:
  schedule:
    - cron: '0 * * * *' # Runs every hour

jobs:
  markscribe:
    runs-on: ubuntu-latest

    permissions:
      contents: write

    steps:
      - uses: actions/checkout@master

      - uses: muesli/readme-scribe@master
        env:
          GITHUB_TOKEN: ${{ secrets.PERSONAL_GITHUB_TOKEN }}
        with:
          template: 'templates/README.md.tpl'
          writeTo: 'README.md'

      - uses: stefanzweifel/git-auto-commit-action@v4
        with:
          commit_message: 'docs: Update generated README'
          branch: master
          commit_user_name: readme-scribe 🤖
          commit_user_email: [email protected]
          commit_author: readme-scribe 🤖 <[email protected]>
And the templates/README.md.tpl is your template file. This is where you can define the content of your README. We will use a small example template to show you how to display the RSS feed content in your README. But, here you can see a more complete example on how to use readme-scribe.
### Hi there 👋

🎧 This is what I have been listening to recently:

{{- range rss "<Your TuneFeed RSS Feed URL>" }}
- [{{ .Title }}]({{ .URL }})
{{- end }}
Replace <Your TuneFeed RSS Feed URL> with the RSS feed URL you copied from TuneFeed.
Commit the changes to your repository and push them to GitHub.
Step 4: Create the Action secret
To make the GitHub Action work, you need to create a secret for it. This secret will be used to authenticate the GitHub Action with your GitHub account.
Use this link to create a new secret: https://github.com/settings/tokens/new?scopes=public_repo,read:user,read:org,repo:status&description=readme-scribe
Copy the secret and add go to your repository's settings, then go to the "Secrets and variables" > "Actions" section. Add a new repository secret with the name PERSONAL_GITHUB_TOKEN and paste the copied secret value.
Step 5: Test the Workflow
To test if everything is set up correctly, you can manually trigger the workflow:
- Go to the "Actions" tab of your
<your-username>/<your-username>repository. - Select the "Update README" workflow.
- Click on "Run workflow."
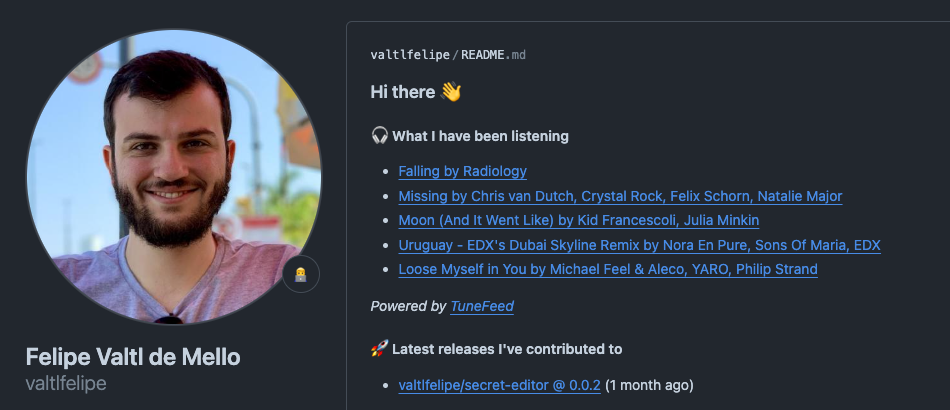
If everything is set up correctly, your profile should look something like this:

That's it! Your GitHub profile README will now be automatically updated with your latest Spotify activity, thanks to TuneFeed and readme-scribe. This setup ensures that your followers always see your current music trends without any manual updates.
Happy coding and happy listening!
Image generated by DALL-E from OpenAI